Seeing a 'failed to open a session for the virtual machine' error with VirtualBox?
Chances are that you do not have virtualization enabled on your system.
And that's one of the several things you need to do to create a virtual machine on any of your Windows-powered systems.
To give you an overview, you need to learn about:
- Enabling virtualization support on your PC
- Using a virtual machine program to create/manage VMs
- Ensuring certain system resource requirements to seamlessly use virtual machines
Here's the first thing:
Enabling virtualization on Windows PC
If you have a system with Windows 10/11 pre-installed, chances are, you already have virtualization enabled. So you do not need to fiddle around with unnecessary settings.
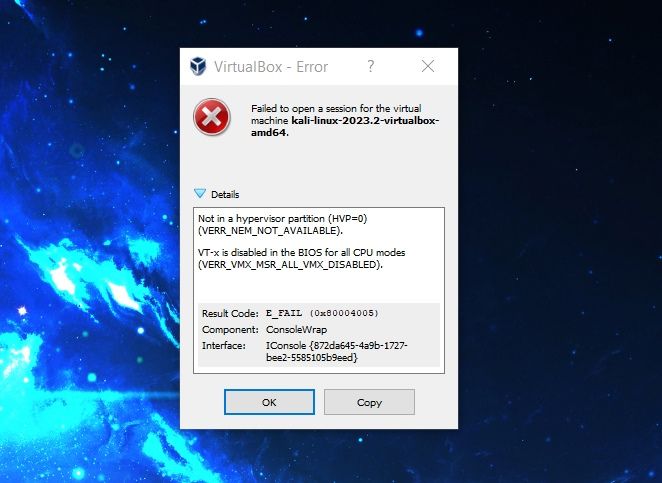
But if you installed Windows manually on your system, you might have to check the BIOS settings to see if it supports virtualization. If disabled, the virtual machine program will not work and give you an error.
Here's what the error looks like when using VirtualBox program:
How can you do that? Here are the basic steps:
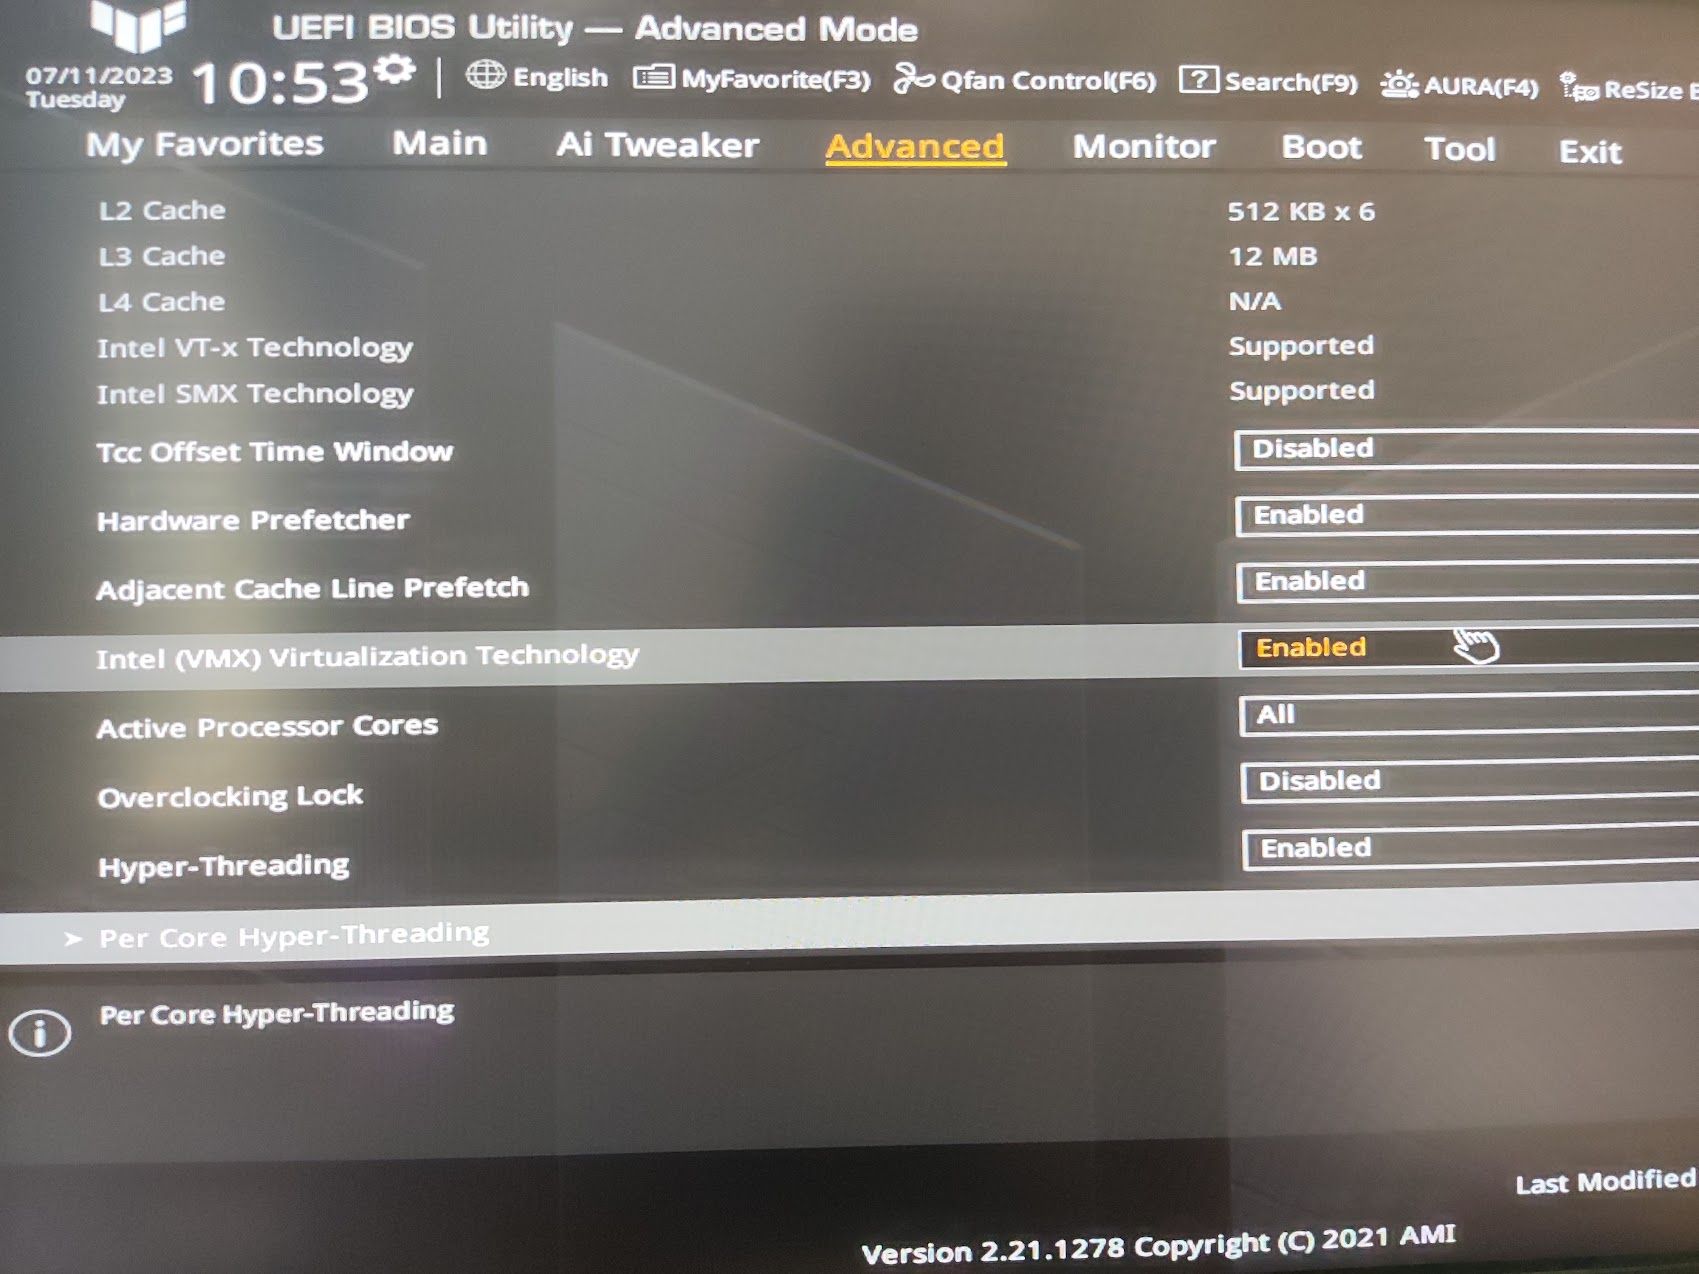
- Head to the UEFI Firmware settings (or BIOS menu). You can usually access it by pressing the "Del" button or F1, F2, F10, or F12.
- Depending on the motherboard manufacturer, the user interface will differ. However, in most cases, you have to navigate to the "Advanced" options in that, and access "CPU Configuration" settings.
- In the CPU configuration, you will have to enable "Intel (VMX) Virtualization Technology" or "SVM Mode" (for AMD processors).
What's next? Considering you already enabled the virtualization support, you need to use virtualization programs to help you finish the job.
Using virtualization programs
You can opt for third-party applications for ease of use, or choose to use Hyper-V that comes baked in with Windows.
Hyper-V
We will not be detailing how to use Hyper-V, but to save you some time, you can follow the steps below to enable it and then follow its documentation to use it.
Considering you have a Windows Pro/Education/Enterprise edition installed on your system, it is easy to enable it from the control panel or using the PowerShell.
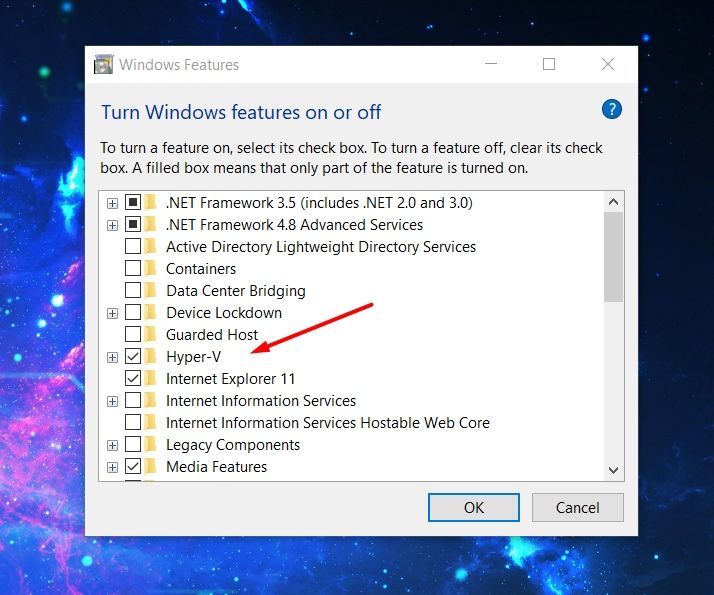
I prefer the control panel, just search for “Windows features” in the search bar or navigate your way through Control Panel → Programs → Turn Windows features on or off
Next, click on “Hyper-V” and hit “OK”. That's it.
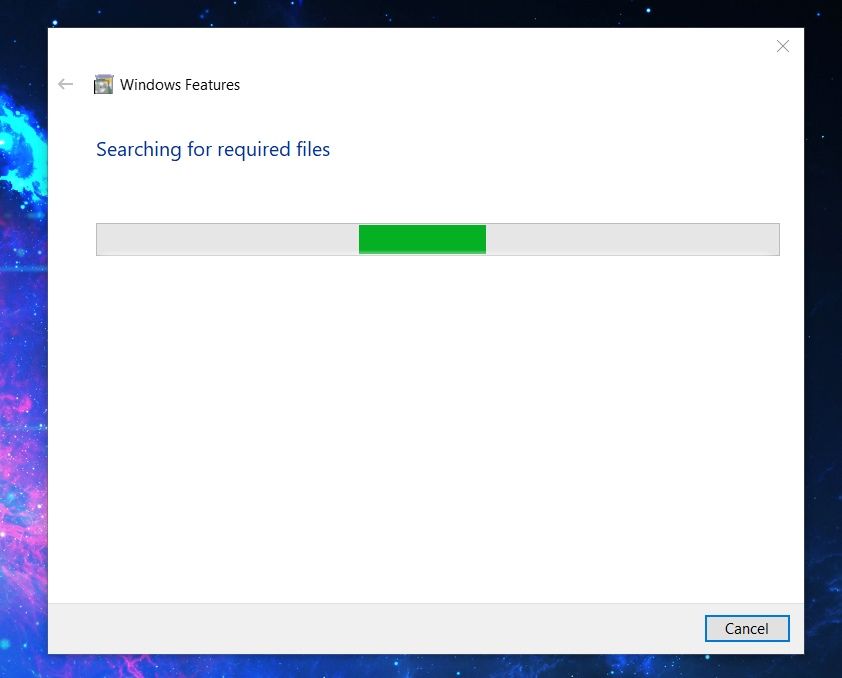
It will apply the changes by fetching the files needed for it. You just have to wait it out.
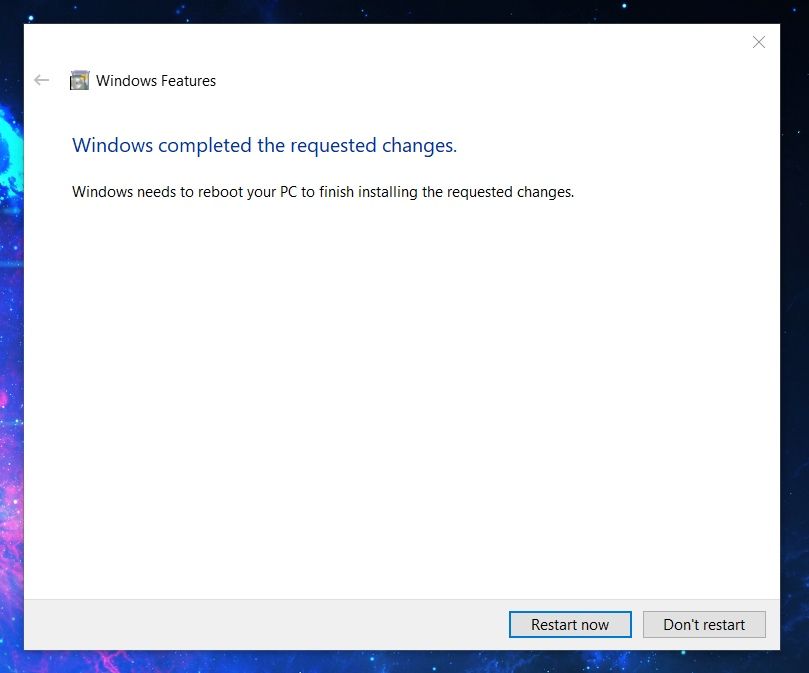
Once done, it will ask you to restart the system to put the new feature in effect.
Third-party virtualization programs
While using Hyper-V allows you to get better performance for virtual machines, it is not as simple to use.
So, third-party virtual machine programs are recommended for end-users.
One of the best bets is VirtualBox. We also have a guide to help you use VirtualBox to install Linux.
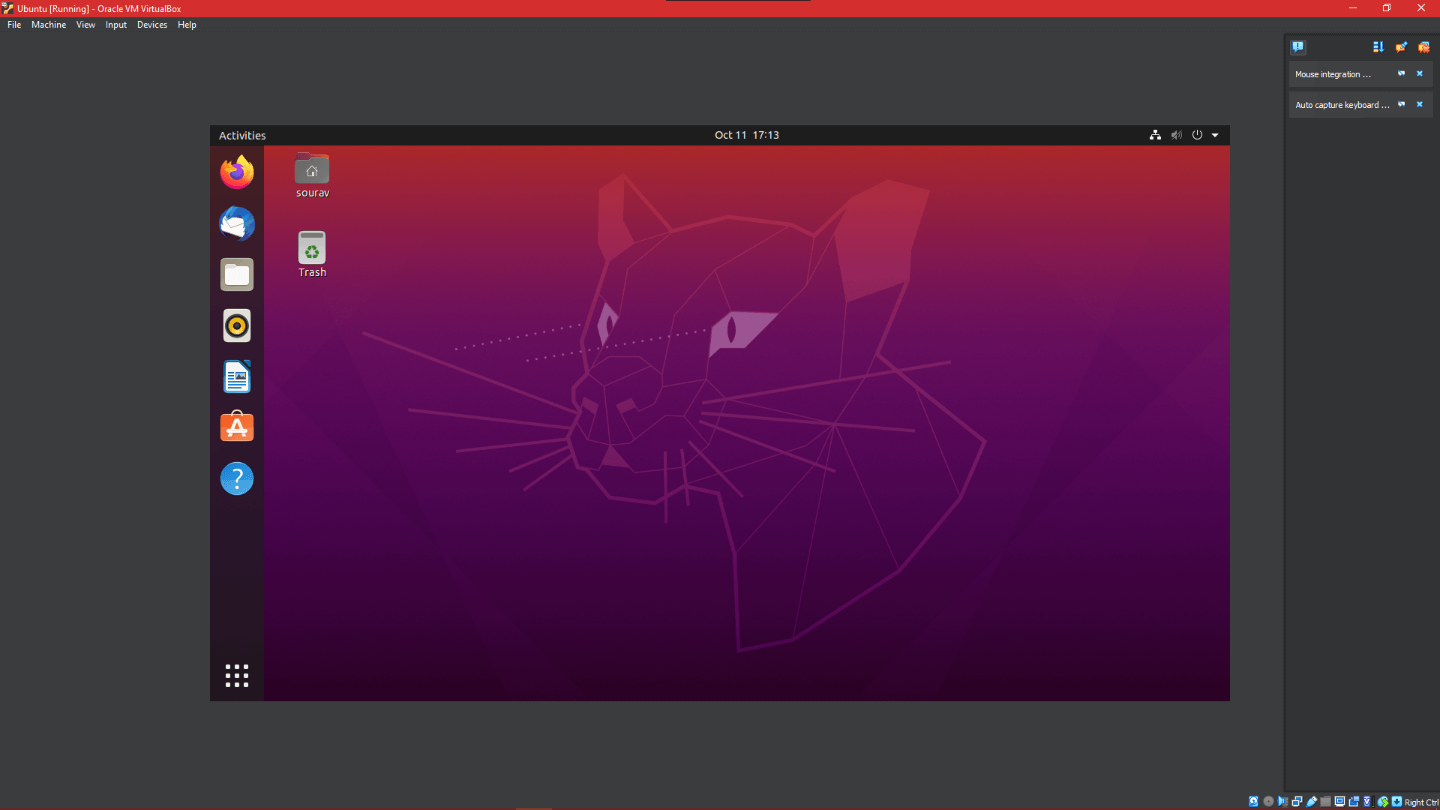
It is an open-source program with a range of features, and a user-friendly interface. You can use it on Windows, Linux, and macOS as well.
You can also opt for proprietary (but popular) options like VMware Workstation.
Want to get an idea on programs like these? You can check out some options available for Linux to see what kind of solutions are available:

Checking system resources and requirements
Creating and using a virtual machine is not entirely a super intensive process. However, there are a couple of variables that you might have to keep an eye on.
Some of those include:
- Making sure that you have at least 4 GB RAM in your system (the more, the merrier)
- 64-bit processor with dual-core or more
If you did not know, VMs use up resources of your system even if they are isolated machines. Most minimum specification recommendations include 4 GB of RAM, but I would recommend 8 GB instead.
If you want to run two virtual machines, you might need more than 8 GB of RAM on Windows.
Coupled with the memory, you should have a processor with multiple cores. So, some cores can freely let you do other things on your host while some are busy with the virtual machines.
Once you are sure about the processor and memory, next comes the disk space.
For virtual machines, the disk is usually dynamically allocated, meaning, the space from your physical storage drive is consumed as much as the OS and its files add up with time.
In some type of virtual disk, it reserves the entire space you specify. So, when you do that, check the free disk space before you initiate it. It is typically a good idea to choose a separate drive where you do not have Windows system installed.
Considering you follow all the above-mentioned tips, your Windows system will be ready to run and manage virtual machines. Now, you can easily install Linux in a virtual machine on Windows.
💬 So, what would be your preferred way to handle virtual machines? Let us know your thoughts in the comments below.


0 Commentaires